ABITBoT User Guide

Agent Guide

This section contains the agent guide...

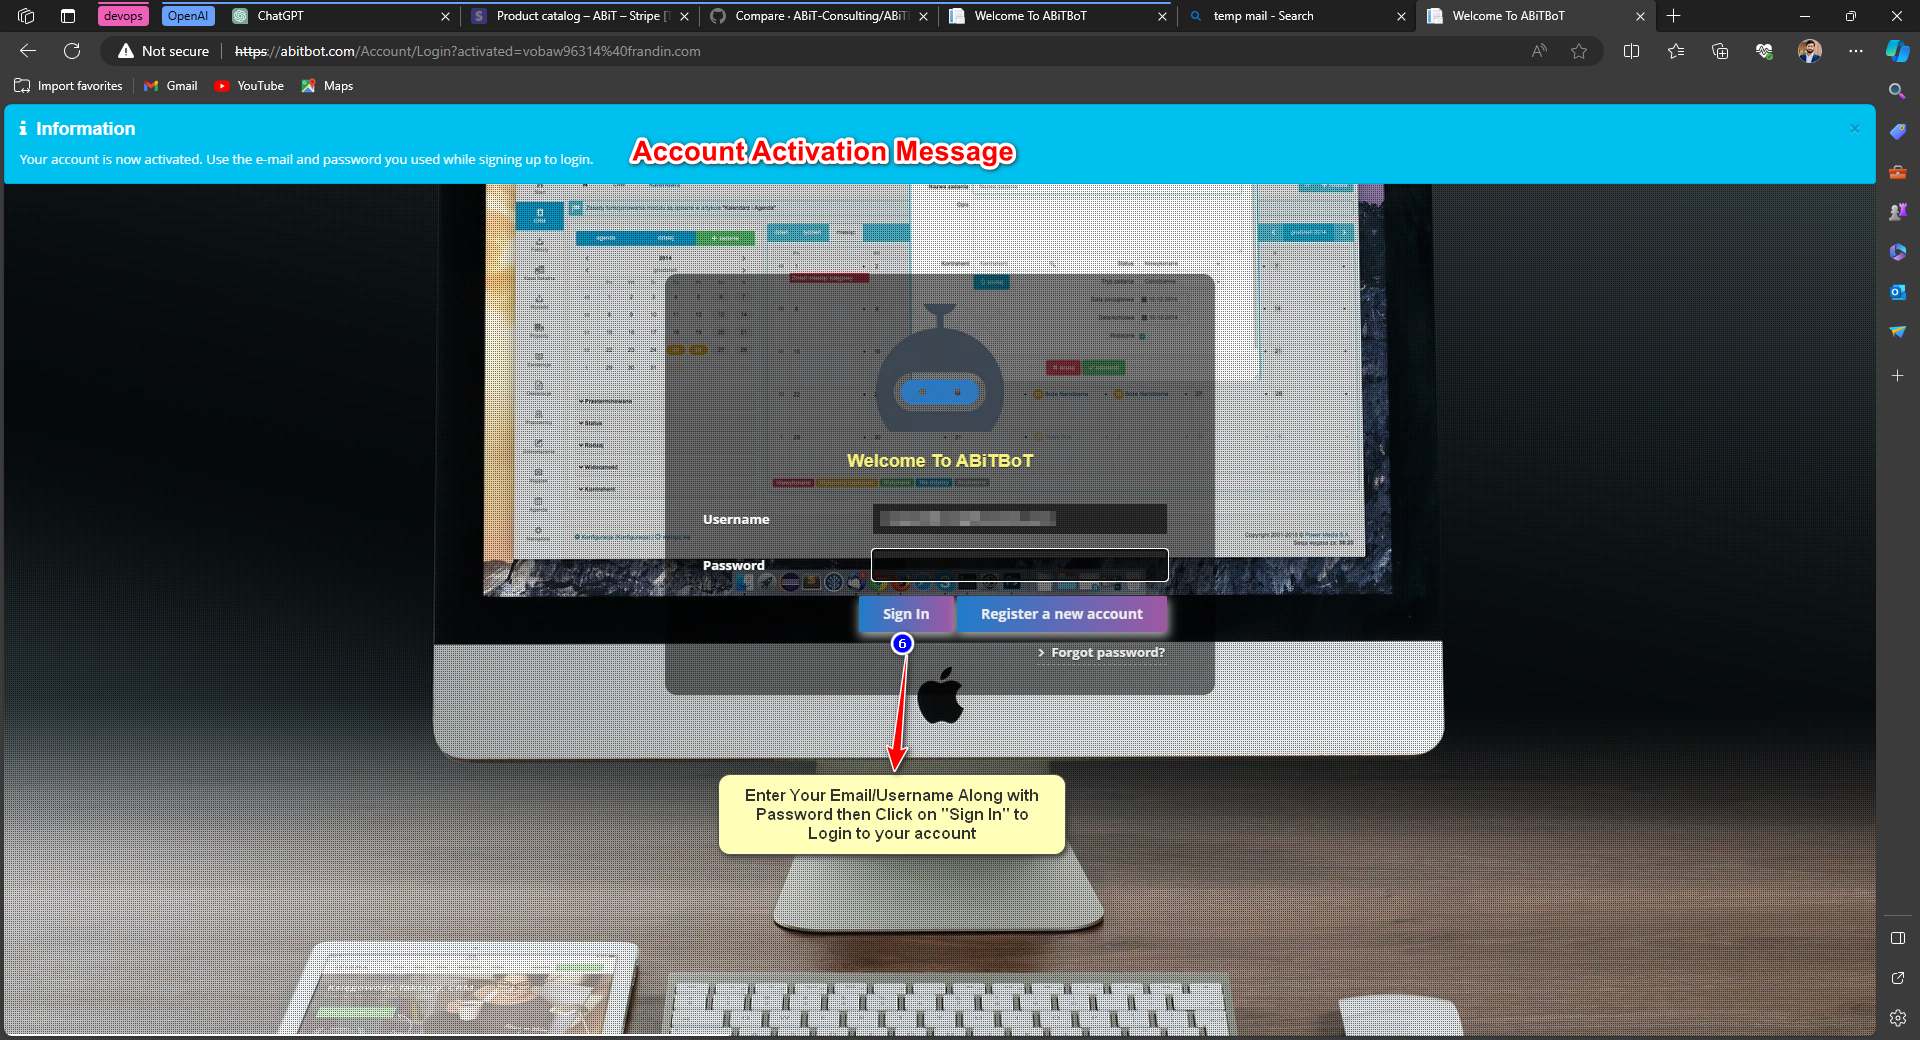
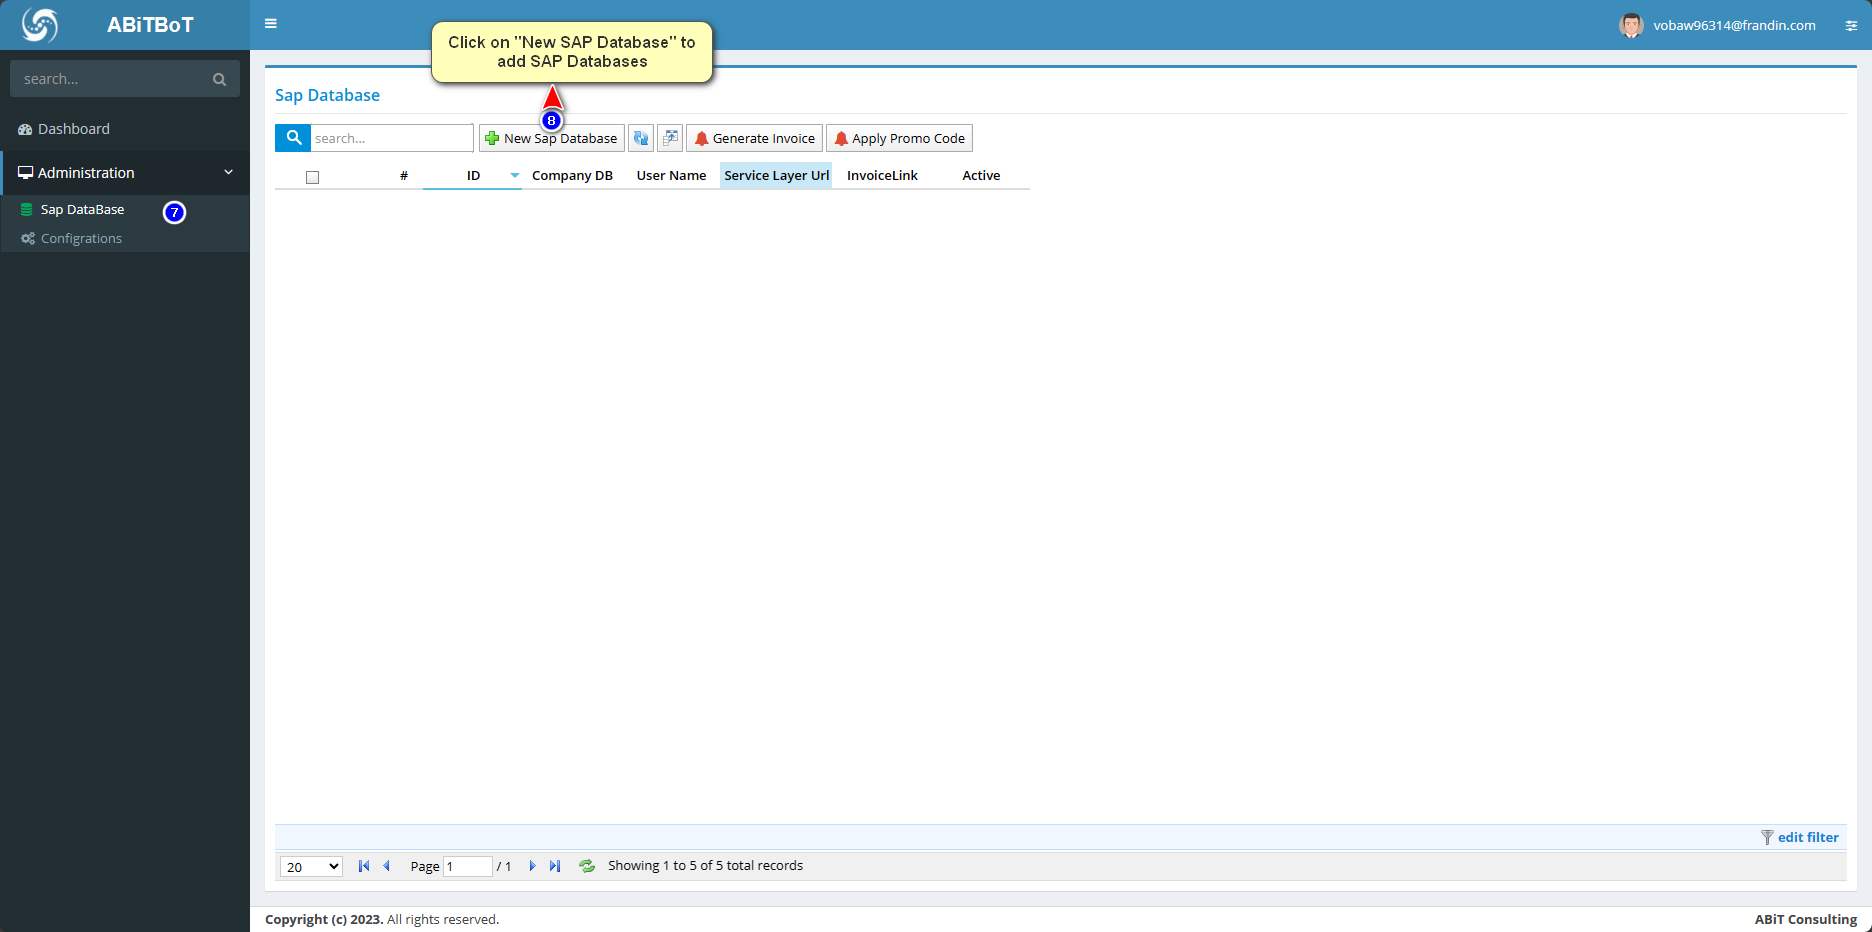
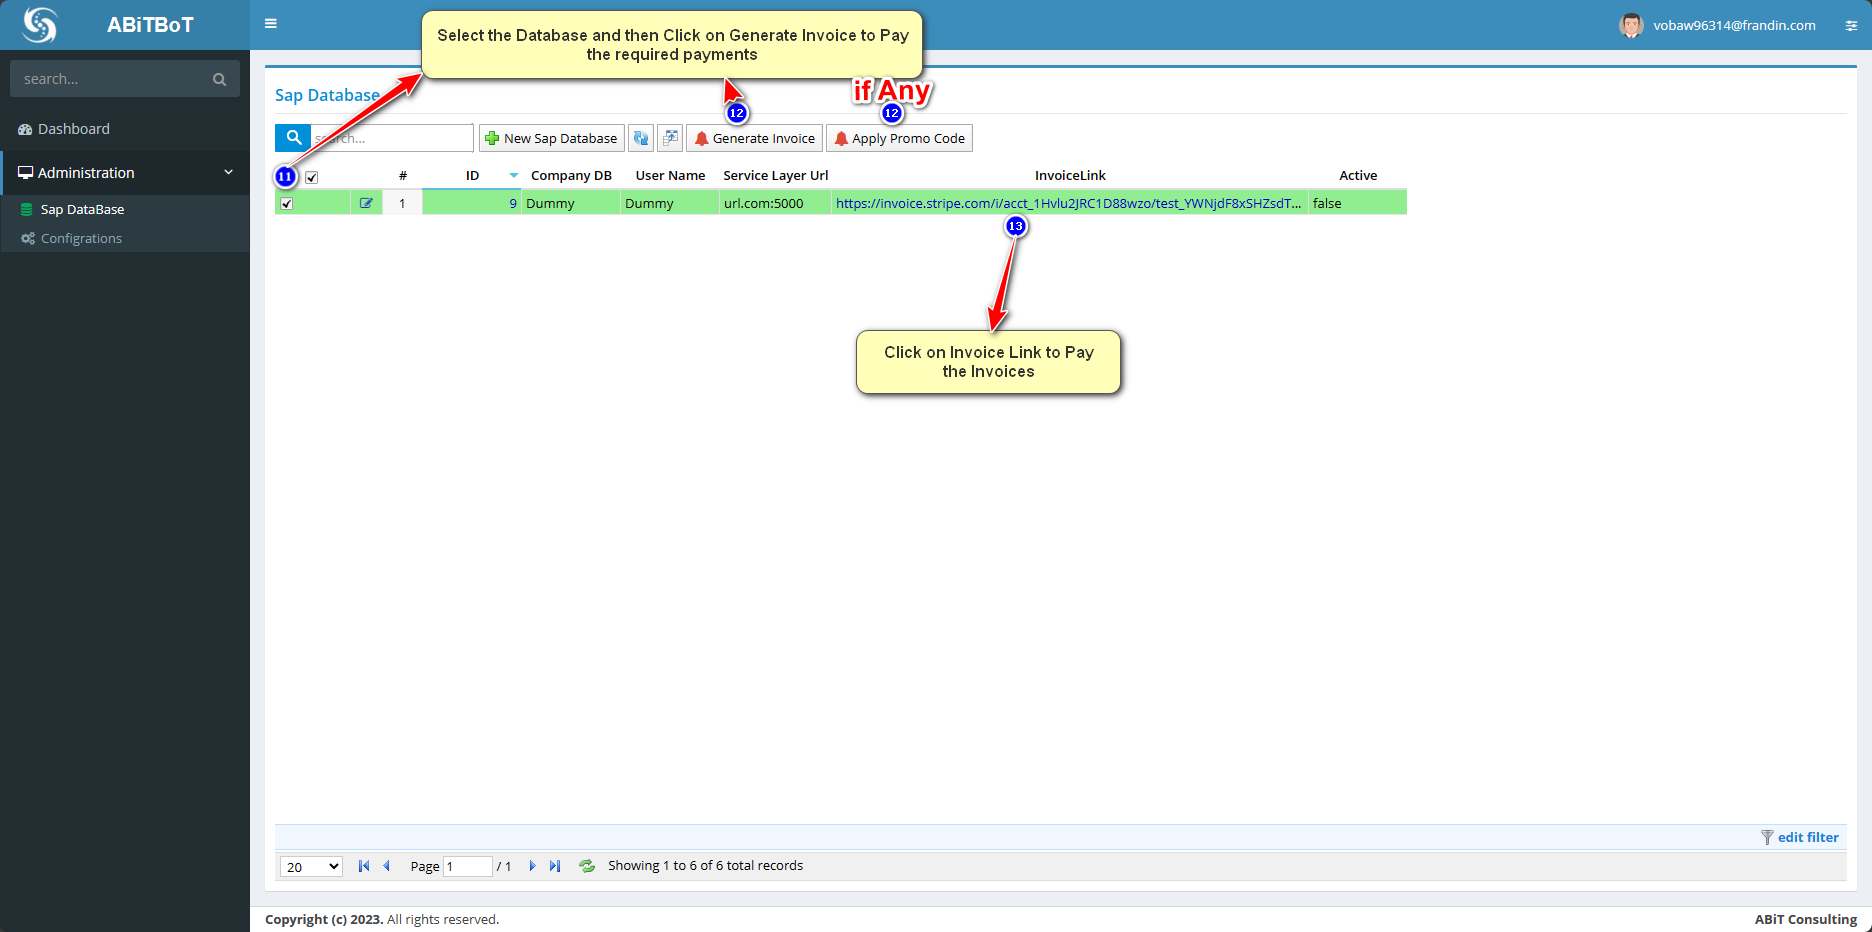
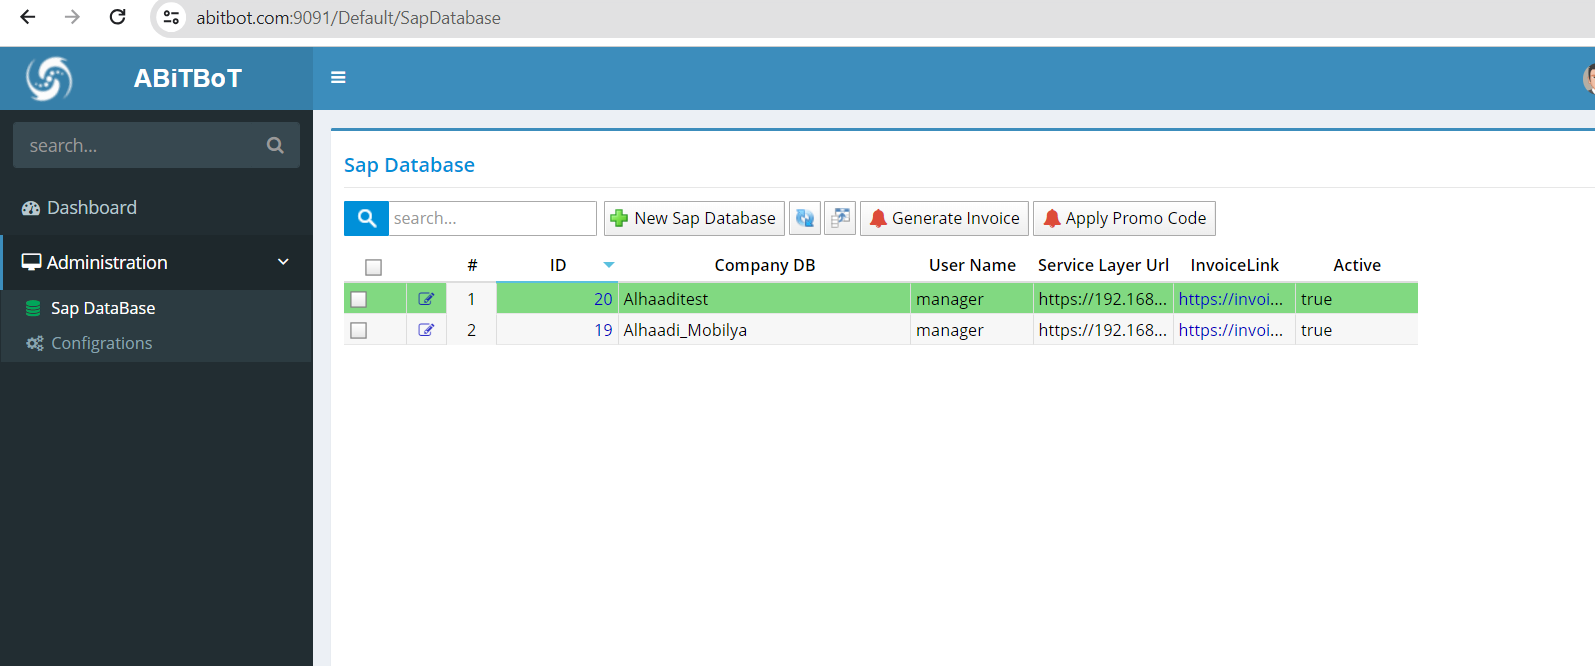
1. Activate SAP Databases

Navigate to the ABITBoT portal and activate the SAP databases from the settings tab.

Activate SAP Database

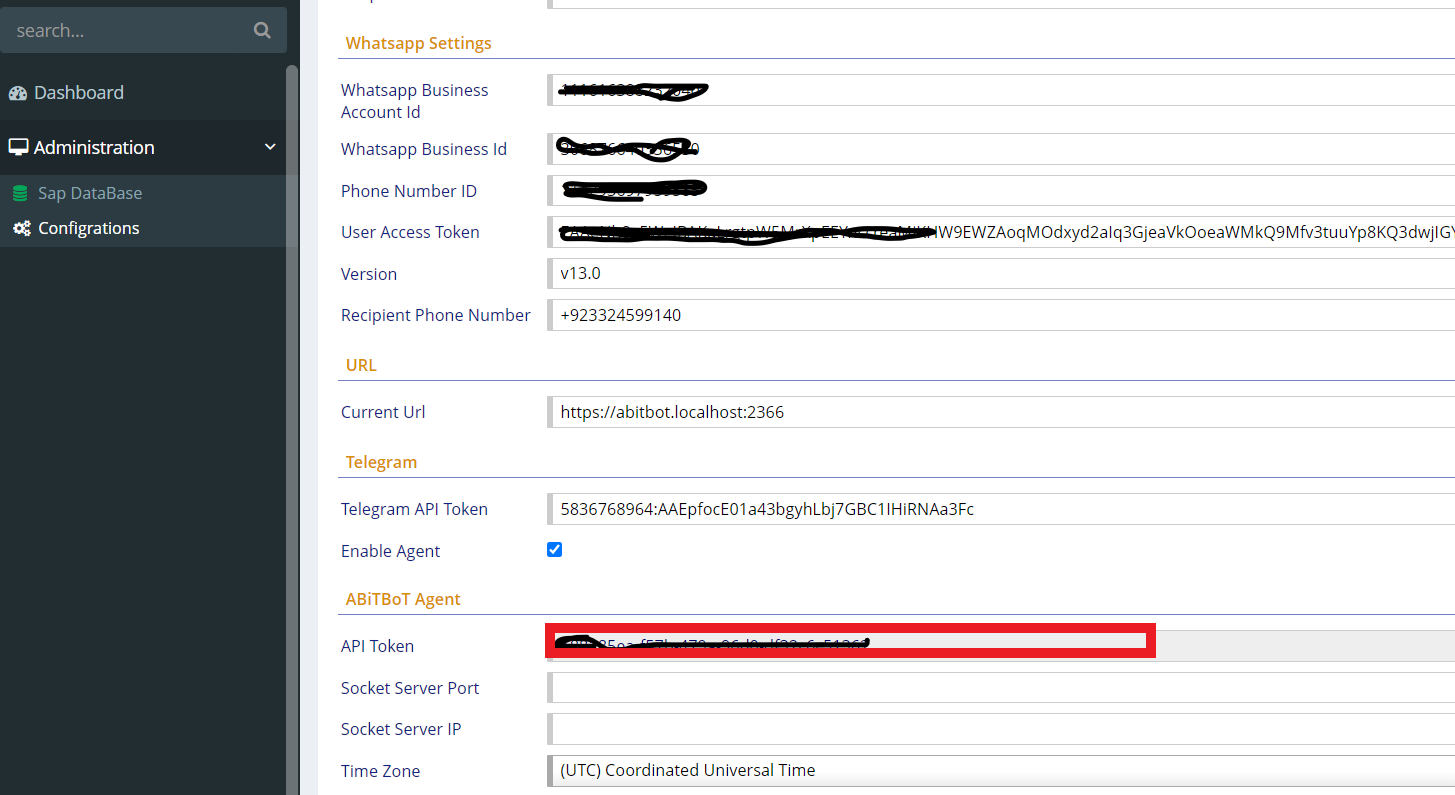
2. Copy and Save Communication Token

Copy the communication token from the portal's configuration section and save it within the ABITBoT Agent settings for communication.

Copy Token

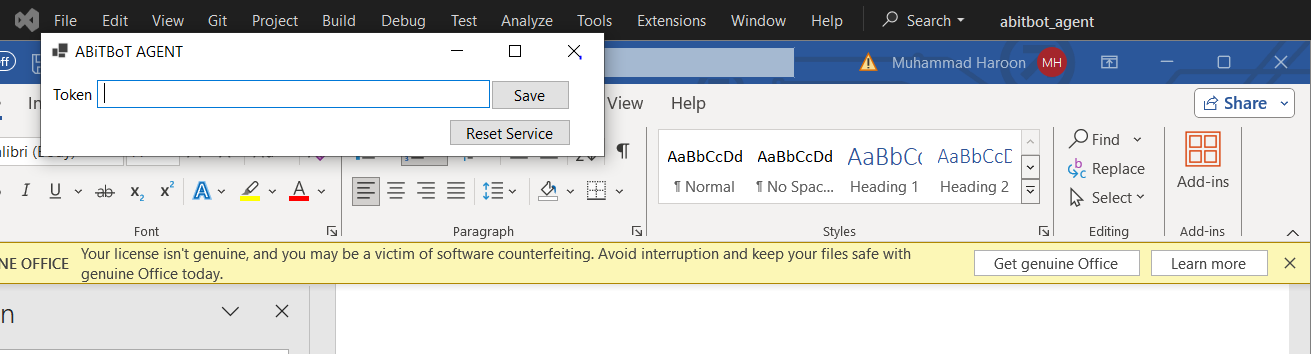
3. Enter the Token and Save

Open the ABITBoT Application from your system tray, enter the copied token in the agent settings, and save to establish a connection with the SAP databases.

Enter Token

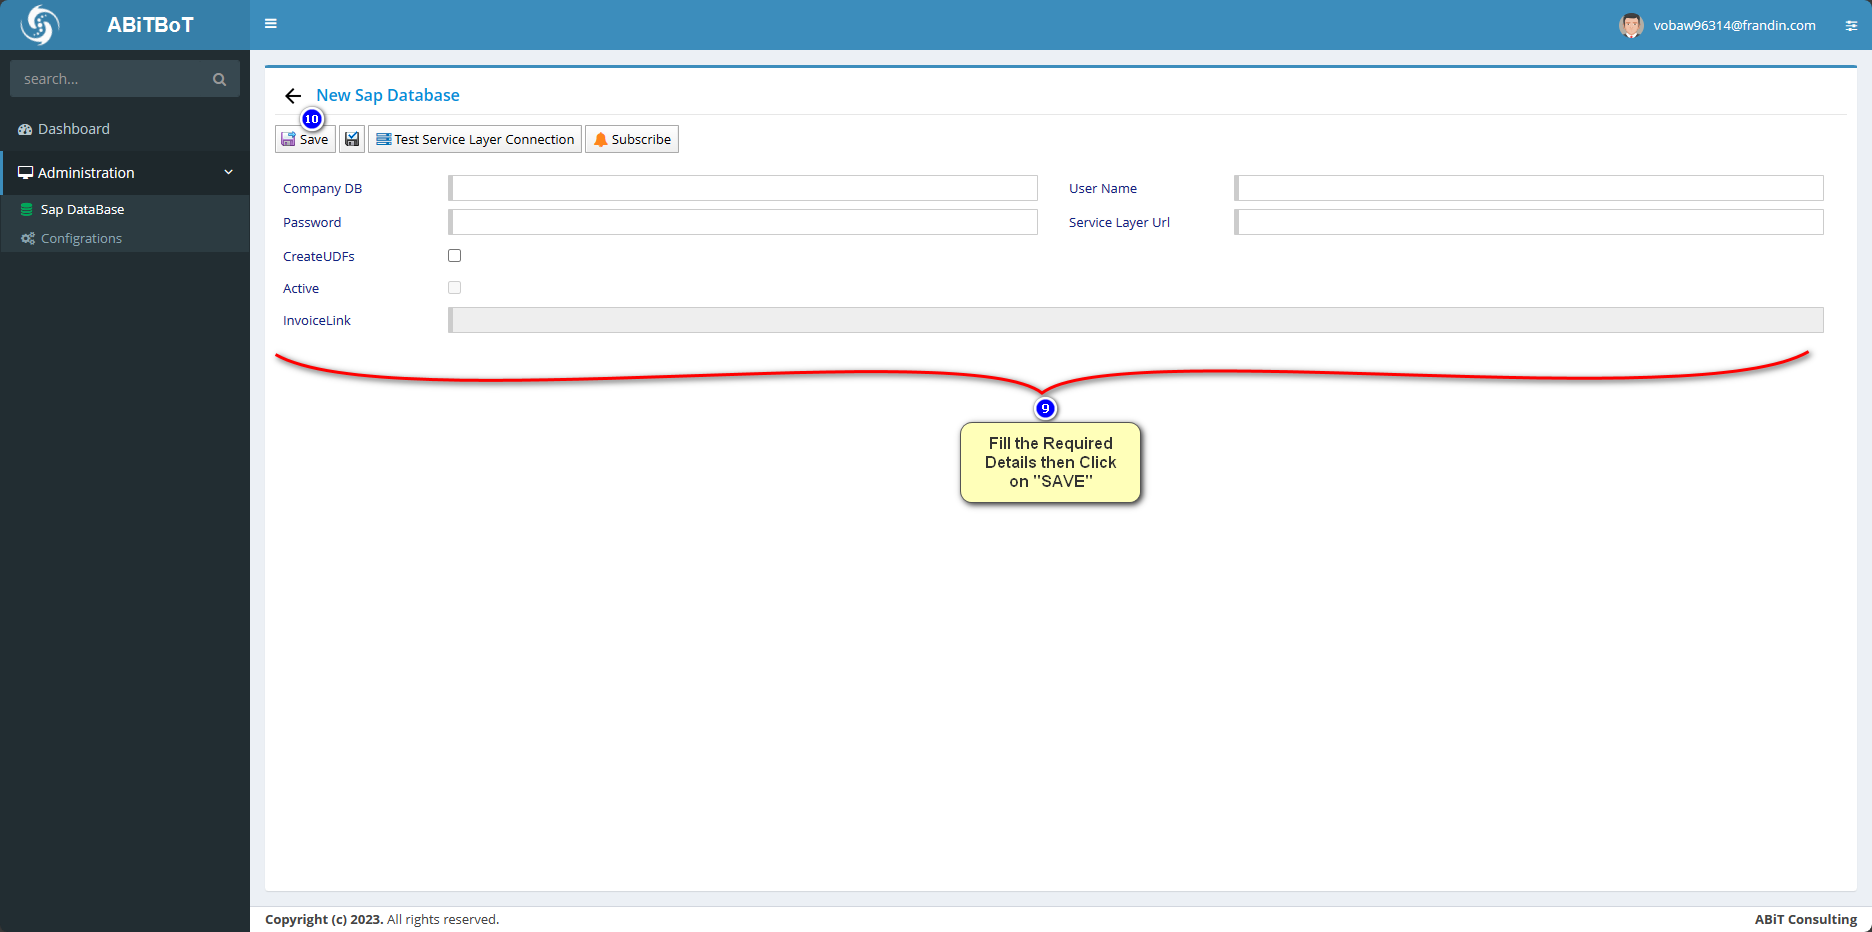
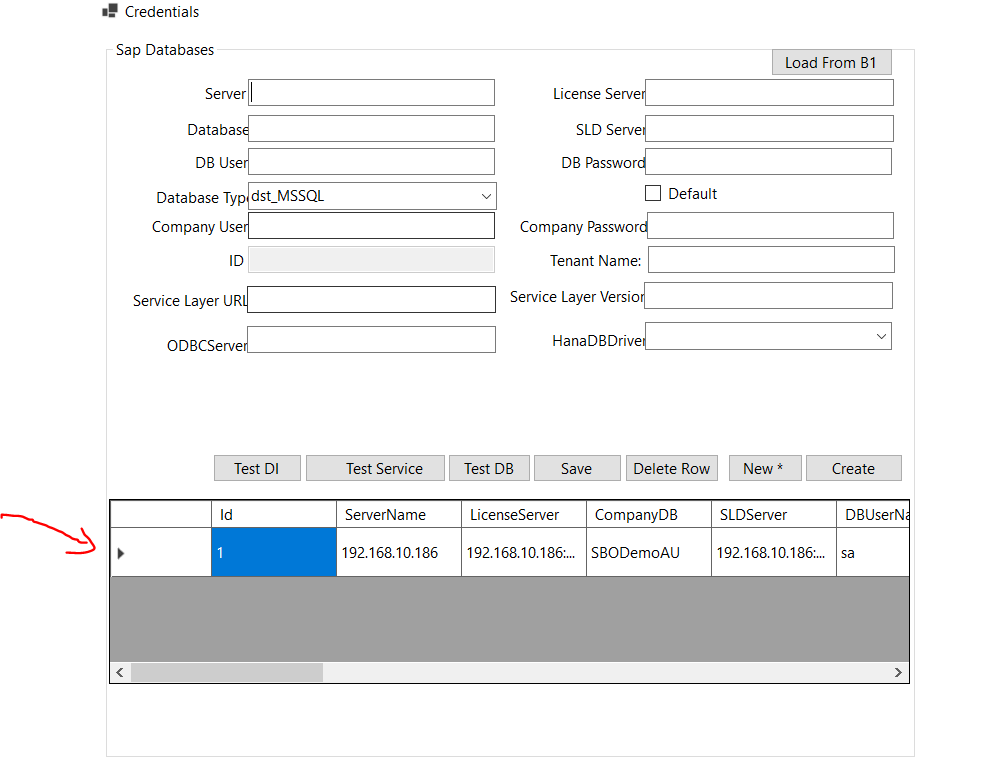
4. Configure SAP Credentials

Fill in the SAP Credentials form in the ABITBoT Agent with your database details and save.
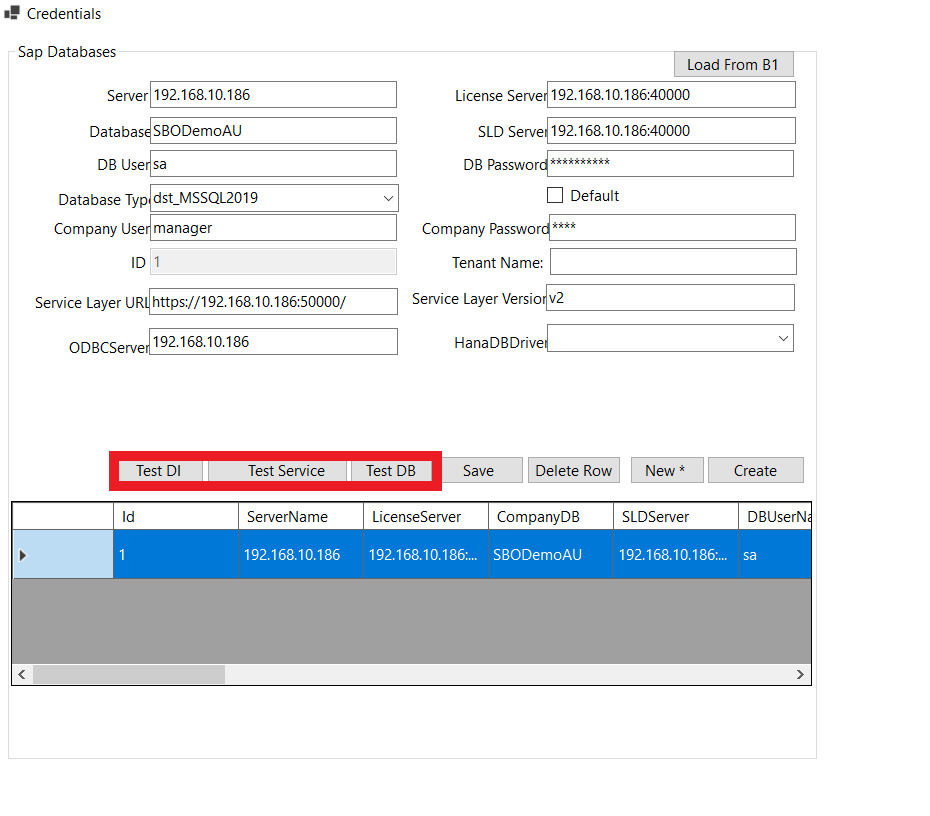
Configure SAP Credentials

5. Test Connections

Use the test buttons provided within the agent to check the Database, Service Layer, and DIAPI connections.

Test Connection

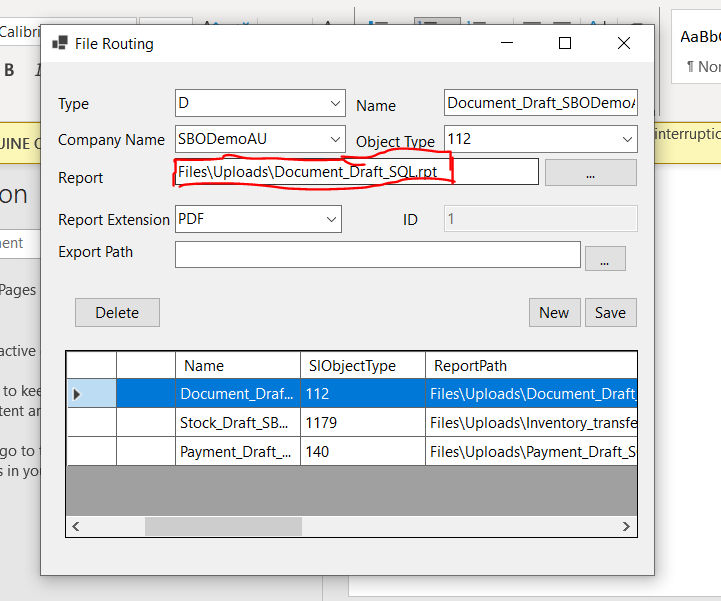
6. Setup Report Files

Add your RPT reporting files according to the file routing instructions and copy them to the specified location.

SetUp Reports

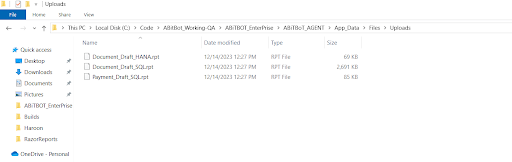
6. Verify Report Files

verify The Reports Exists in the Agent Folder. Verify on This Agent Address "C:\Program Files (x86)\ABIT_BOT\App_Data\Uploads\" Or Where Agent is Installed.

Verify Reports

Portal Guide

This section contains the portal guide...

1. Navigating to the Registration Page

Visit the ABITBOT website at www.abitbot.com. On the homepage, locate and select the "Register a new account" link.

Registration Page Navigation

2. Registering a New Account

Registration Page Screenshot

3. Account Activation Email

After registration, an email will be sent for account activation. Click "OK" on the popup and check your email.

Email Activation Screenshot

4. Verifying Your Email

Open the activation email and click the activation link.

Email Activation Link Screenshot

5. Logging into Your Dashboard

Login Page Screenshot

6. Exploring the ABITBoT Dashboard

Get familiar with the dashboard layout and features, including the "New SAP Database" button.

Dashboard Screenshot

7. SAP Database Management

Add SAP DB Screenshot

8. Invoice Payment Process

Review invoice details after clicking the "Invoice Link".

Invoice Details Screenshot

9. Completing Payment

Payment Details Screenshot